Introduction to the Buttonhole attachment for single needle lockstitch sewing machines
The Taiwan buttonhole attachment is a versatile tool designed to create precise, high-quality buttonholes on industrial or domestic single needle lockstitch sewing machines. With specific features like adjustable length, width, and zigzag depth, it’s ideal for sewists seeking professional finishes and also for small scale businesses looking for cost effective solutions without having to buy the independent Buttonhole Machine. Follow this step-by-step guide to install and use the attachment effectively.
**Note: It’s recommended to dedicate a separate machine with reduced speeds of 800rpm for the buttonhole attachment, as attaching and detaching it takes considerable time and may disrupt normal sewing on your primary machine.**
Attaching the Buttonhole on an Industrial lockstitch sewing machine
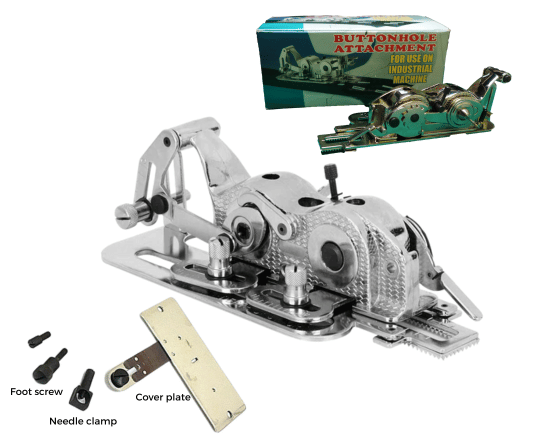
Step 1: Prepare Your Machine
- Turn Off the Machine: Always power off the machine for safety during installation.
- Remove Existing Parts: Detach the needle thread guides from your machine needle bar. This step is essential to make room for the new needle clamp (only for industrial).
- Install the Supplied Needle Clamp: Replace the existing needle clamp with the one included with the attachment, ensuring it’s securely tightened.
4. Reduce Speed: The attachment requires to be operated at low speeds between 750rpm – 900rpm. So set your machine speed to the appropriate speed or else the screws and moving parts of the attachment will be damaged.
Step 2: Attaching to the machine
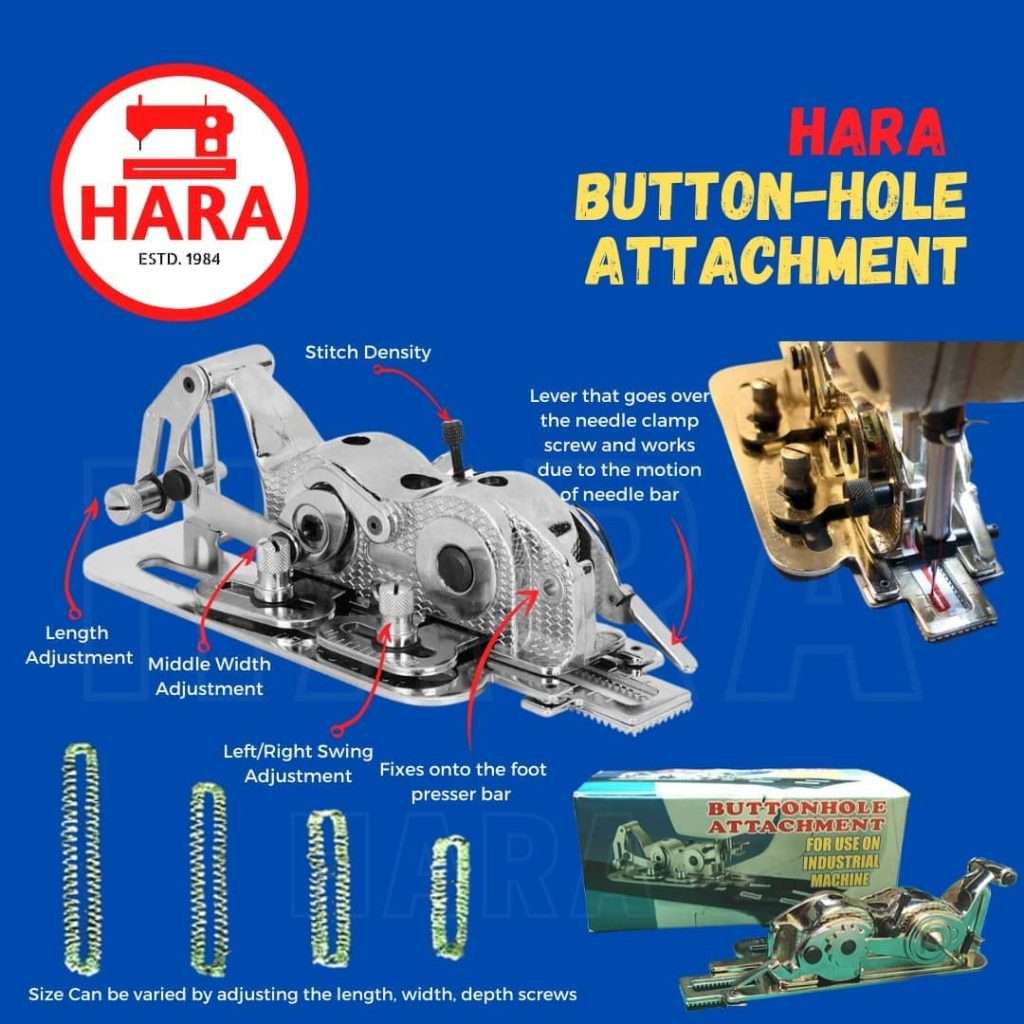
- Position the Lever: Use the screws provided to attach the attachment to the foot presser bar. Make sure the lever of the attachment is above the needle clamp provided. Ensure the connection is firm, as this ensures proper synchronization with the needle movement
2.Install the cover plate: Install the feeddog cover plate given and secure it firmly to ensure no movement of the plate. Depending on your machine screw holder, an additional washer may be needed to secure it firmly.
3.Check Alignment: Manually turn the handwheel to ensure the lever moves freely and also the needle clears the cover plate without obstruction
Step 3: Threading the machine
- Mount the Attachment Base: Lower the attachment using the foot lever onto the machine bed, aligning it with the needle plate hole. Tighten the screws to secure it in place.
- Thread the Machine: Follow the standard threading process for your machine, ensuring the thread moves smoothly through the guides. Turn the handwheel and take the lower bobbin thread up between the cover plate and the attachment.
 Step 4: Adjust Settings on the Attachment
- Set Buttonhole Length: Turn the adjustment screw for length to match your button’s size.
- Adjust Width and Middle Cutting Space: Use the respective adjustment screws to control the width of the buttonhole and the cutting space between the stitches.
- Modify Zigzag Depth: Fine-tune the zigzag depth to achieve the desired stitch density. These adjustments will depend on the fabric and button style and size.
Step 5: Prepare the Fabric
- Mark Placement: Use tailor’s chalk or a fabric pen to mark the starting point and alignment of the buttonhole on your fabric.
- Stabilize the Fabric: If working with delicate or stretchy fabrics, apply interfacing or stabilizer to prevent distortion and fabric jamming.
Step 6: Sew the Buttonhole
- Position the Fabric: Place the fabric under the attachment, aligning the marked point with the needle.
- Engage the Fabric Clamp: Lower the attachment to hold the material securely in place.
- Start Sewing: Run the machine at a steady slow speed. The attachment will guide the fabric and create the buttonhole automatically based on your settings.
Step 7: Inspect and Finalize the Buttonhole
- Examine Stitches: Remove the fabric and check for even stitches and proper alignment. Adjust settings if needed and test again on scrap fabric.
- Cut the Opening: Carefully cut open the buttonhole using a seam ripper or small buttonhole scissors, placing a pin at each end to prevent over-cutting.
Tips for Optimal Results
- Test First: Practice on scrap fabric to ensure settings are correct for your project.
- Maintenance: Clean and Grease/oil the attachment regularly to maintain smooth operation.
- Use Quality Materials: Select threads and needles suited to your fabric for the best results.
With these steps, you’ll be able to unlock the full potential of the IBA 10/ FBA 20 Taiwan buttonhole attachment, producing professional, tailored buttonholes with ease. Happy sewing!
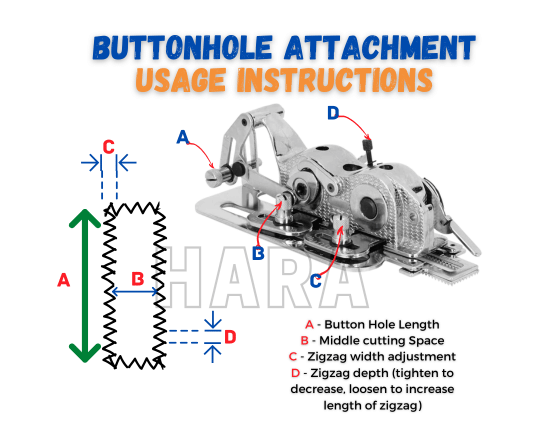 Step 4: Adjust Settings on the Attachment
Comment
Very Useful